Introduction
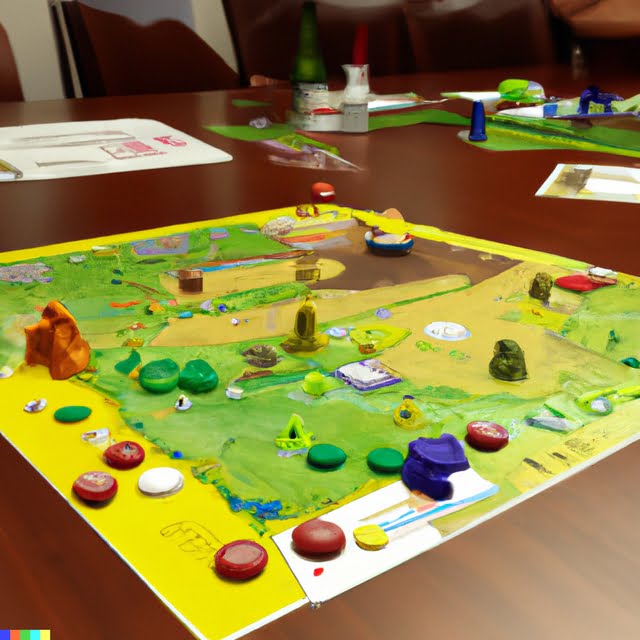
Making your own wooden board game is an enjoyable and rewarding experience. Not only do you have the satisfaction of creating something tangible and unique, but you also end up with a fun item that can be enjoyed over and over again by the whole family.
The benefits of making your own wooden board game are numerous. For starters, you don’t need any outside help or fancy equipment to make a board game. All it takes is some basic tools and materials such as wood, nails, glue, paint, and other craft supplies to get started. Additionally, since you are crafting your own game, you get to create whatever theme or gameplay rules that you’d like – allowing for endless possibilities of creative expression. You can choose from simple layouts all the way to complex pieces with intricate boards, mechanics, graphics and figures.
Moreover, by doing all the work yourself including designing custom game pieces on the computer and making them into physical objects using 3D printing or laser cutting technology, build a life-sized version in your backyard using woodworking materials “the only limits are really your creativity! This makes it especially appealing for hobbyists who want to make something one-of-a-kind that they can treasure forever. With careful planning and execution time well spent on each project before moving onto the next one “you’ll notice amazing results in no time!
Gathering Supplies
The supplies you will need for making a wooden board game vary depending on the specific game that you want to make. Generally speaking, you will need wood boards, wood glue, sandpaper, paint and varnish. Depending on the complexity of your game and the components that it requires, you may also need metal fasteners such as nails or screws, magnets to hold pieces in place or plastic discs to contain small components.
When gathering supplies for making a wooden board game, keep in mind that quality is key. The type of wood boards you use will affect the look and durability of your game. For example, if you are going to be assembling your game with wooden pegs rather than metal hardware like screws or nails, then thicker boards are preferred to prevent any warping due to weight or moisture in the air. When selecting paints and varnishes, spend some time researching which types will best suit the longevity and look of your game’s design.
The best place to buy supplies for making a wooden board game is at a local craft store that specializes in woodworking supplies. You can often find hardwood boards at lengths appropriate for smaller-scale projects such as board games as well as adhesive products such as glue and wood stain. Other types of hardware may be more difficult to find locally; if this is the case, consider shopping online from sellers who specialize in home improvement products such as bolts and screws. Not only will this help you save money, but it also allows you greater access to different sizes and finishes of materials which can add a unique element to your finished board game!
Cut List and Plans
1. Gather the tools required for cutting and design: power saw, miter saw, drill with a variety of bits, chisels, rasp, sandpaper, and wood glue. All of these tools will help make the job simpler and allow you to create a professional-looking board game. Be sure to wear protective equipment when working with these types of power tools.
2. Prepare a space to work on the project; the garage or backyard is ideal due to its ability to be mess-free but any other room in your house can do too. Lay out all the materials needed for your project before getting started; this way you can be sure not to miss any key components of your board game.
3. Select or purchase wood that is suitable for the board game’s structure; plywood is typically a good choice if creating something with more stability as opposed to solid pieces of hardwood which offer more detail when cutting pieces into specific shapes such as those found in chess or checkerboards.
4. Design a plan for your board game and make a cut list based off this plan; sketches are very useful at this stage as they provide an outline when creating a pattern or drawing out exact measurements across large portions of wood that may be difficult to imagine otherwise.
5. Begin cutting through the pieces of wood according to the cut list created based on this plan; use appropriate bits within each hole drilled so it will securely hold each piece in place during later steps in assembly throughout game construction process.
6. After all pieces have been cut down from their base boards, assemble them together using some heavy-duty adhesive like wood glue; after pressing down each piece firmly against one another for about 15 seconds (or until completely moistened), let them sit overnight so that glue has time settle properly between joints without having any gaps caused by shafts separating too quickly due thin amount applied around edges interiorly upon assembly time passed now wait 12hr minimum before proceeding onto last few steps here constructing your wooden board game’s set up…
7 Using either chisels or files clean up any rough edges left behind during initial panel cutting processes ensuring even surface topology over entirety pertaining board timbering following over now need round corners/angles figure eight counters etc…before applying several medium grade sandpaper sheets across entire face slowly yet consistently increasing grades matter grains found paper packs used while brushing areas done part not looking so nice afterward wipe off sawdust accumulating surfaces prime coat layer most often referred oil ,based water mix prior lasting edification step here, rubbing substance lightly over wooden frame allowing 2 – 4 hours pass dry then spray protectant clear coating chosen specially designed furniture items known defend against scratching daily handling wear tear onboard seen precaution protective sealant setup …aesthetically speaking !!!
Assembly
Making a wooden board game is an enjoyable and rewarding project. However, it requires patience and precision in assembly. Here are some tips and techniques for assembling the game:
1. To start off, ensure that all parts of the board game have been cut to their correct sizes accurately before attempting any constructions. Also check the dimensions of each piece to make sure they will fit together properly.
2. Before beginning the process of assembling, gather supplies such as glue, clamps, nails, sandpaper, saws and chisels.
3. Sand down any harsh edges on each part so that they fit snuggly together. This will also help create a smooth surface for attaching pieces/components to each other with minimal effort.
4. When gluing two parts together make sure they are perfectly aligned before clamping them together firmly while drying to ensure stability once the glue dries up completely. Ensure that you do not over tighten or damage the wood in the process to ensure a lasting joint between components once constructed and leave enough time for curing before taking apart again for further work or painting if necessary
5. Nail or screw items into place for extra reinforcement after gluing components up as an aid towards keeping things in place when needed such as doors and lids or back panels etc by pre-drilling holes first then finish nailing into place with fine finishing nails / screws
6 Lastly, make sure you take time cleaning up excess glue from around joints making your game look neat and polished which makes sure nothing gets stuck in places when playing with the pieces later on!
Finishing and Painting
When finishing and painting your wooden board game, you will want to take into consideration the look you are trying to achieve. Different types of paints can be used to customize the board game according to your preferences. For example, a basic paint like an acrylic paint can quickly give the board a vibrant color. Alternatively, stain and varnish can be used together to create a beautiful finished product that offers protection while still allowing some of the natural grain of the wood to show through. Applying multiple coats of protective sealer is a great way to ensure your game remains durable over time and provide water resistance as well as UV protection from fading due to sunlight exposure. If you’re looking for something more special, you could also explore techniques such as decoupage, stenciling, or airbrushing which turn an ordinary wooden game into a one-of-a-kind piece of art!
Testing and Final Touches
Before the board game is ready for play, it’s important to test it out to make sure all of the components are functioning properly. To do this, play the game with friends or family and have them give you input on different aspects of the rules and regulations as well as any design errors that need to be addressed. After getting feedback, adjust and refine the rules of your game accordingly until it’s ready for its public debut.
Once your game has been thoroughly tested, the final touches before playing the boards game involve giving it a more finished and professional look. Start by staining wooden pieces if desired with clear coat lacquer for added protection. If graphics are part of your game, take extra care in ensuring they are evenly printed, free from smudges and straightly placed on their respective surfaces. Additionally, you may want to give components such as dice and other detachable small pieces a sanding if necessary so that no rough edges exist prior to gaming. Lastly, remove any excess glue or splinters from surfaces with fine grade sandpaper for a smoother finish before playing!
Conclusion
Making a wooden board game is an fun, creative project that requires some determination and tools. It’s possible to pull together the materials required by raiding junk stores, garage sales, and even your own attic in order to create a homemade version of everyone’s favorite games. Since many of the necessary supplies are recycled it’s also very eco-friendly! The steps for this project can be broken down into four main categories:
1. Gather Supplies ” You will need saws, sandpaper, wood glue and other woods items to craft your custom boards. Painting and a variety of other accessories should also be considered here as well.
2. Design Your Board ” Through trial and error, use play testing to make sure all your components fit perfectly. Think about what pieces should be placed where for maximum impact.
3. Cut & Assemble ” Use saws and other cutting tools to make accurate cuts on the wood pieces you have gathered for your game board in step 1. Next use wood glue to assemble all the pieces together until they sit firmly in place according to your design specifications in step 2. Sand any rough edges off before attaching more accessories such as handles or lids if desired.
4 Finishing Touches ” The final step is to add a few extra aesthetic elements like decals stickers, varnish, paint or stenciling detail if desired to make the board look unique and stand out from standard store bought versions!
Pros of making your own board game instead of buying one include saving money since typically store bought ones are more expensive than DIY versions; having control over aesthetics so you can get exactly what you want when making it yourself; encouraging creativity due the customizing options at hand; plus all crafts produced with this method tend to become instantly dear family heirlooms due their personal touches! Cons include time consuming process as most people are not used being able work with wood or cutting tools for long periods; potential frustration levels when designs fall short upon testing or something breaks during assembly; plus danger citing from working with power tools which can be serious if proper caution/protective gear is not utilized while working around them.
Overall creating a homemade wooden board game is definitely worth it most times due its cost effective nature, customization benefits plus iconic memories created between generations that go along with these one-of-a-kind toys!

I love playing all kinds of games – from classics like Monopoly to modern favourites like Ticket to Ride.
I created this blog as a way to share my love of board games with others, and provide information on the latest releases and news in the industry.


